Setup
To be able to develop programs in Java through Intellij, a few different programs are needed.
Download and Install Intellij
Navigate to https://www.jetbrains.com/idea/download/ or google “install intellij” without quotes.
Select your operating system.

Click the black download button below Community as we will not be using the paid Ultimate version

After clicking the download button, a popup will appear asking where you would like to download the installer to on your computer.
Select the desktop and click Save.

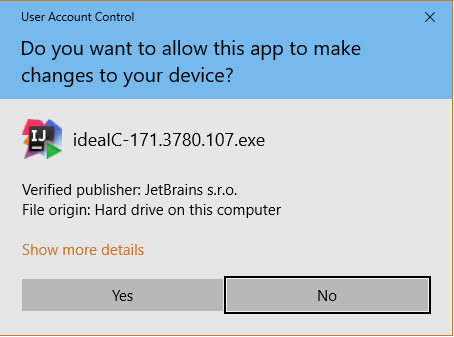
Once downloaded, double click the installer, which looks like this.

After double clicking the icon you may be prompted to allow the Intellij Installer to make changes to your device. Clicking Yes is necessary for the installer to install the appropriate files to your computer’s hard drive.
Click the next button to begin.

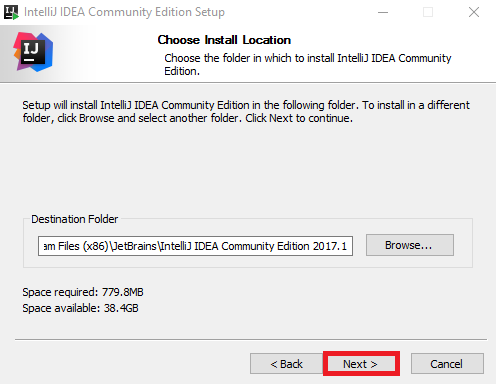
Select a personalized download location, or simply click next to accept the default location.
Create a desktop shortcut or any file type associations, or simply click next to accept the default values.

Specific start menu folder, or accept the default value of “JetBrains” and click next.

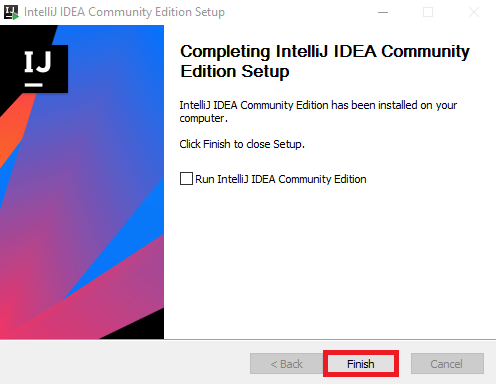
After clicking the install button IntelliJ will begin installing using the options you selected previously. You should see a screen that looks like this.

Click the checkbox beside Run IntelliJ IDEA Community Edition.
Now click Finish.
You Are Done!
Download and Install JDK
To actually develop Java, we require the Java Development Kit or JDK for short. This is a package that contains the tools needed to compile, debug, and test code written for Java. We will need to download the kit from Oracle.
Navigate to http://www.oracle.com/technetwork/java/javase/downloads/index.html to find the latest Java related downloads.
Click the Java Platform (JDK) link.

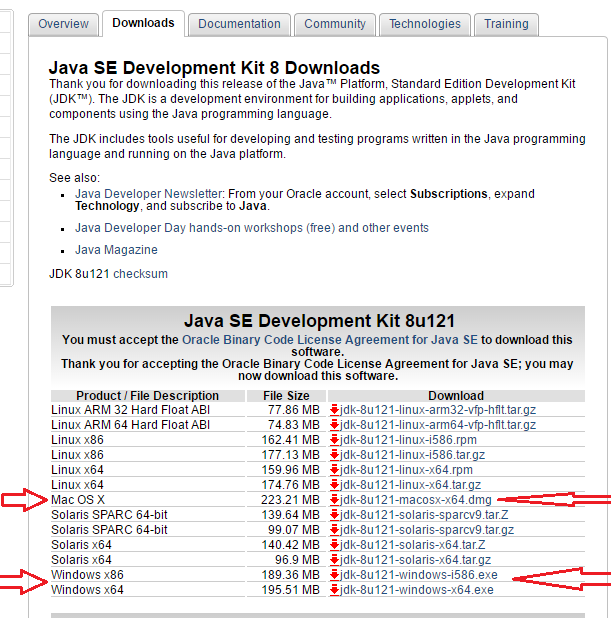
To download the JDK you must accept Oracle’s Binary Code License Agreement for Java SE. If you decide not to accept the license agreement, you cannot download the JDK and will not be able to develop Java.

Select the download for your specific operating system. You should only download one file. If you do not know what version of Windows you are running, jump to Setup - Downloading the JDK.
After clicking the download button, a popup will appear asking where you would like to download the installer to on your computer.
Select the desktop and click Save.

Once downloaded, double click the installer, which looks like this.

After double clicking the icon you may be prompted to allow the JDK Installer to make changes to your device. Clicking Yes is necessary for the installer to install the appropriate files to your computer’s hard drive.
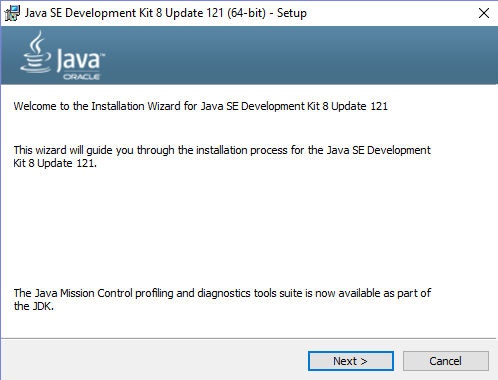
Once the installer has launched, click next and follow the instructions displayed in the installer.
Once the install has finished, we need to setup the Environment Variables for the JDK, specicially: JAVA_HOME. To do so, first locate the install path of the JDK. If use did not change the install path in the JDK Installer and it used the default location then you can find it at C:/Program Files/Java/. Within this folder, you will find a folder called jdk1.8.0_XXX where XXX is the specific build. The latest version available at the time of this writing was 1.8.0_121, so our path is: C:/Program Files/Java/jdk1.8.0_121 as shown below.

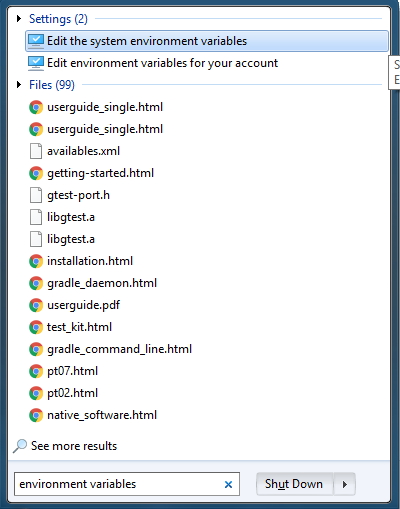
After you have determined the path to your JDK install, we need to actually set the Environment Variable. This can be done by opening the Start Menu and typing environment variables and selecting `Edit the system environment variables. This will cause a window to pop open.
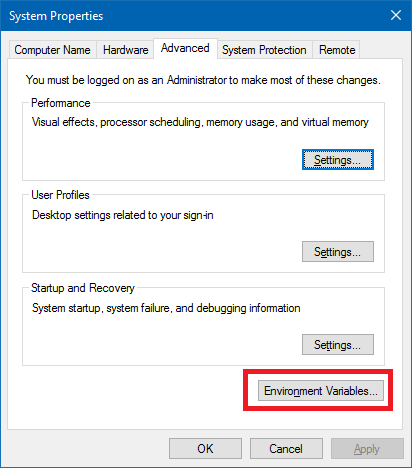
Click the Environment Variables button at the bottom of the window to open the Environment Variable settings.
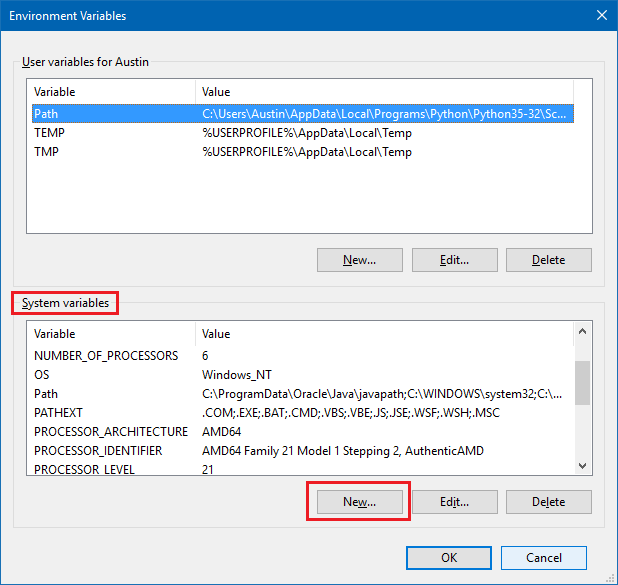
In the second section titled System Variables, click the New button to add a new environment variable.
In the box that pops open, you need to provide both the Variable name and Variable value. Insert JAVA_HOME`as the `Variable name and insert the path to your JDK directory as the Variable value. Ours was C:/Program Files/Java/jdk1.8.0_121/, however yours may be different. We found this value in step 10!
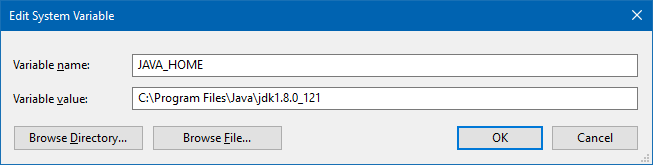
After inserting the values, click the Okay to finalize your input for the new environment variable.
If you check, you should now see the JAVA_HOME entry in the System Variables. Click the Okay button to save the changes to your environment variables and close the window.
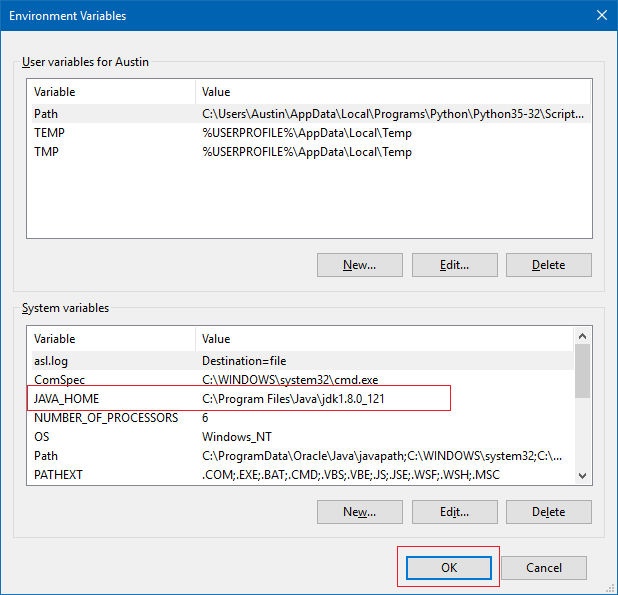
That’s it, you’ve completely setup the JDK! Now with both Intellij and the Java Developer Kit setup you are ready to proceed to Setting up a Java Project in Intellij!